Search
Complete Guide to Building Your Brewery

$19.95 USD

Support our site by using these affiliate links
Control Panel (Part 1)
STEP 10: Install PIDs and timer
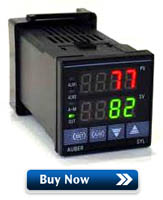 Three SYL-2352 PID controllers are used to display and control the liquid temperatures in our setup.
At approximately $50 each, these are some of the least expensive PID controllers available on the market today. Most industrial PIDs start at $200 and go up from there.
The front panel of the PID controller conforms to an IP54 rating which means it is protected from dust and splashing of water. Not quite as rigid as IP65 (completely sealed from dust and water jets) but still adequate for our usage.
They are 1/16 DIN size (45x45mm).

 An Omega PTC-21 countdown timer is used to time the various brewing steps. It is also 1/16 DIN size (45x45mm) and IP65 rated. If you have trouble sourcing the Omega PTC-21, the Eagle B506-5001 timer is a direct replacement. Identical functionality, no wiring changes required.
While other timers will also work, we like the Omega with four buttons for changing the time (instead of two as found on most other models) as it's much more convenient. On the Omega PTC-21, you simply press any of the four buttons to change the four digits directly. On most other models you use one button to cycle through the digits and then a second button to change the value. Considerably slower in use.
If power to the control panel is interrupted during a countdown, the Omega PTC-21 remembers the time and continues where it left off when power returns. This is a very handy feature if you live in an area with frequent power interruptions or happen to turn the control panel off momentarily during use (either on purpose or by accident). Most other timers do not have this non-volatile memory and lose their countdown if power is momentarily lost.
If you choose to use a different timer keep in mind that it will have completely different terminal connections and programming steps as compared to those in this guide. You'll need to refer to your timer manual for wiring diagrams and programming instructions.
To install the PID controllers and timer, remove the collar and slide the device through the opening. Slide the collar back on from the inside.
If your PIDs do not include rubber gaskets, before tightening the collar on the PID controllers apply a bead of all purpose kitchen/bath silicone sealant around the edge on the inside of the control panel to provide a better seal. Two #4 x 1" long wood/metal screws were used for each device to hold it in place more securely than just using the plastic collars alone. The collar already comes pre-drilled with holes in opposite corners specifically for this purpose. The Omega PTC-21 collar already includes screws and does not require sealant as it includes a rubber gasket.
PID controllers installed with Silicone sealant around the edge.
Two #4 x 1" wood/metal screws help hold the PID tightly against the door.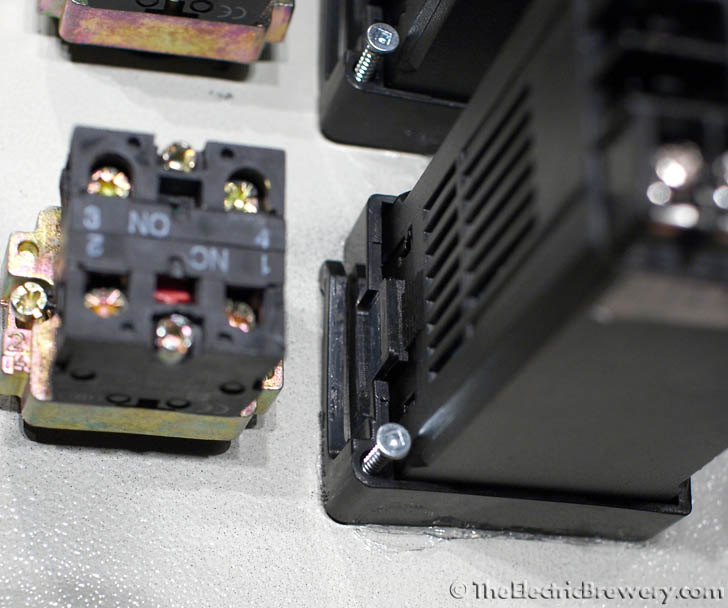
Door components have all been installed.
The Omega PTC-21 timer with large grey socket is seen to the left of the three PID controllers.


