Search
Complete Guide to Building Your Brewery

$19.95 USD

Support our site by using these affiliate links
Wort Chiller
STEP 3: Attach the water hoses
As the hot wort circulates through the counterflow chiller inner coil, cold water flows through the outer coil extracting heat from the wort.
The cold water is supplied from the faucet of the large commercial sink (24x24" bowl) that sits next to our brew stand. The heated water simply goes down the drain. If you can, re-use the heated water for washing brewing equipment, laundry, watering the plants (after it cools down of course), or any other useful purpose.
Commercial stainless steel sink (24x24" bowl) with wall mount pre-rinse unit with faucet:
Cold water supply and drain hoses made of reinforced vinyl. Both water hoses simply hang out of the way in the sink when not in use. The cold water supply line is connected when needed for chilling. 
 We use reinforced vinyl (PVC) tubing for the chiller water lines. There is no need to use more expensive silicone tubing as the wort never comes in contact with this hose. Silicone tubing cannot be used anyway as it cannot withstand typical household water pressure - it would blow up like a balloon. Reinforced vinyl tubing includes an embedded nylon braid which strengthens the tubing and also prevents it from kinking. It's rated to 150-180F which is high enough for our use.
The counterflow chiller water in/out connections are standard garden hose fittings as most brewers brew outdoors. We'll be attaching fittings to our reinforced vinyl tubing so that we can attach them to the fittings on the counterflow chiller.
Use whatever length of reinforced vinyl tubing is required to reach your water supply and drain. It is typically sold by the foot. Measure and then purchase a few extra feet (just to be safe).
When connecting to the chiller, make sure the hot wort and cold water inputs are at opposite ends. We want the water and wort to flow in opposite directions to maximize heat transfer. Standard hose clamps are used as reinforced vinyl hose is much tougher than silicone. There's no need to use the special smooth-band worm-drive hose clamps we used with our silicone hoses.
Breakdown of parts:
(A) Faucet to garden hose adapter
(B) Brass 1/2" hose barb to female garden hose swivel coupling
(C) Hose clamp (5/16" to 7/8" diameter hose)
(D) Reinforced vinyl (PVC) tubing 1/2" ID
(E) Brass 1/2" hose barb to male garden hose coupling

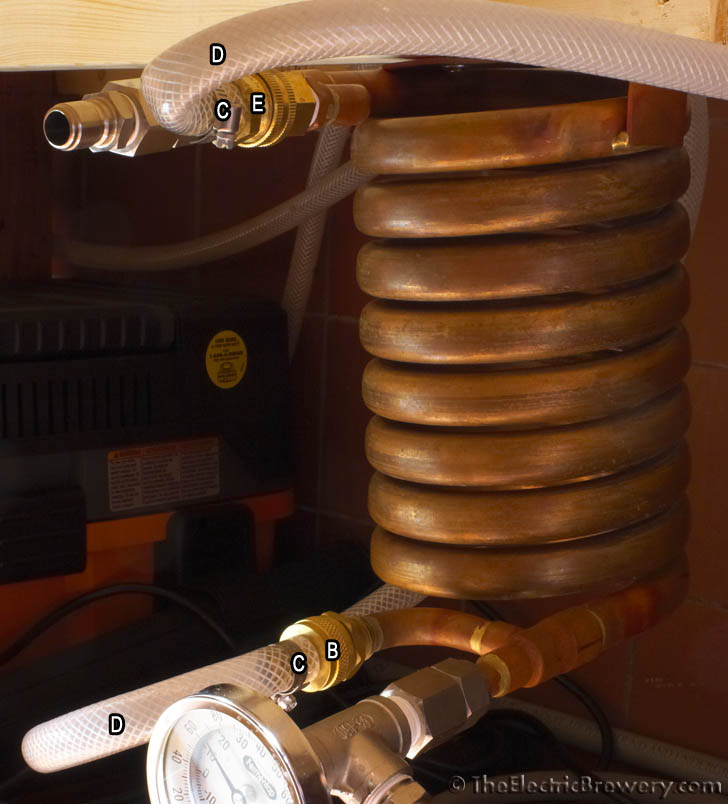
Attach both hoses to the counterflow chiller and tighten to compress the rubber washers in the couplings. Run water through the chiller to test for leaks and tighten as needed. The water lines will stay connected at the chiller end at all times. There's no need to disconnect or drain the water between uses.
The counterflow chiller includes a mounting bracket with two holes. Use two 2.5" deck screws to attach the chiller to the 2x6" cross beam under the top shelf of your brew stand. If attaching to a stainless steel work table, most will have a similar reinforcing cross beam but we need to use metal screws instead: Drill two pilot holes using a 1/8” high speed metal drill bit and attach the chiller using two #8 x 5/8” metal screws.
You may want to use some pipe straps or brackets to keep the hoses out of the way under your brew stand.
Pipe straps keep the water hoses up and out of the way: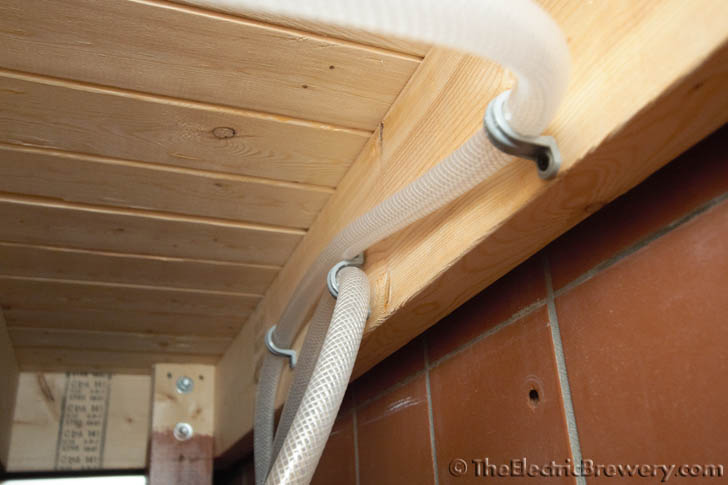
Done! You're one step closer to making beer.
Continue on to Building Your Brewery - Control Panel (Part 1).


