Search
Complete Guide to Building Your Brewery

$19.95 USD

Support our site by using these affiliate links
Ventilation
STEP 1: Choose a hood
 The first place that indoor brewers tend to look for venting heat and moisture are lower priced range hoods, the type that are typically used in the kitchen over stoves or cook tops, as they can be purchased for well under $100. These range hoods are usually underpowered for use when boiling a full 10-15 gallons of wort as the fans they use do not produce a high enough airflow (measured in CFM or cubic feet per minute).
Lower priced range hoods tend to use fans with blades which produce very little static pressure, meaning that they will only work as rated when venting directly outside through the wall (no duct at all). Add any amount of ducting and the airflow drops dramatically. The airflow drop is exacerbated with longer duct runs, runs with elbows, or smaller diameter ducts. It's not uncommon to see the airflow drop by 50-80% by simply adding a 10 foot duct with a turn or two. The little blade fan is unable to "push" the air adequately due to resistance.
Most indoor brewers are brewing in the basement and therefore require some length of ducting to vent the heat and moisture. Using one of these inexpensive range hoods with reduced CFM over 10-15 gallons of boiling wort (usually done with a 6-15 foot duct run) typically results in more humidity in the house than we'd like to see and condensation forming on the inside of the hood. This condensation then tends to drip back into the boiling wort. While using a lower priced range hood is better than nothing at all (any reduction of moisture is better than none), most brewers would prefer a better solution.
Inexpensive range hoods typically only come in one size too: 30" wide to fit over a standard range or cook top. While most of the heat and steam in our brewery comes from the Boil Kettle, we'd prefer to use a hood that covers all 3 kettles to adequately trap all heat and moisture. This means we need a hood that is at least 64" wide and 24" deep.
If you choose to use a lower priced range hood, place the fan intake directly over the boil kettle and try to minimize airflow restriction by venting directly outside through the wall. Minimize the use of ducts as much as possible. A better solution is to remove the hood fan completely and use a better inline fan (see next section for recommendations). You'll be using the range hood only to direct the heat and moisture.
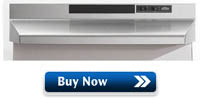
Lower priced range hood (150-250CFM):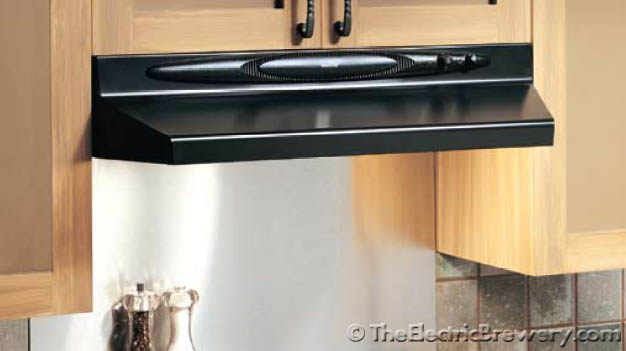
A typical blade fan with motor (low static pressure) found in most lower priced range hoods:
Professional range hoods are available that have considerably better airflow, better static pressure (able to drive long ducts), and come in larger sizes (some up to 66" wide or larger).
These range hoods use centrifugal (squirrel cage) fans that have a wheel composed of a number of ribs mounted around a hub. The hub is turned by a motor driven drive shaft. The air enters the center and is accelerated out the sides due to centrifugal force as it flows over the fan blades. This design allows centrifugal fans to create considerably higher levels of airflow at greater static pressures. This means that the performance is not affected as much by long duct runs. If your house has a forced air furnace it most likely uses a centrifugal fan (or blower) for this exact reason.
The only issue with professional range hoods is price: They tend to be extremely expensive, often many thousands of dollars. A high end range hood wide enough to cover all three kettles can easily cost well over $5,000 USD.
These range hoods also typically come with other features we don't need such as halogen lighting, heat lamps, automatic heat sensors, baffle filters, advanced grease traps (some that are auto-cleaning), and so on.
Unless you can find one used or from a restaurant going out of business, we don't recommend using a professional range hood as they're typically more expensive than the custom hood and fan solution we used.
Professional range hood (1100CFM):
A centrifugal fan (higher static pressure):
 So what to use? The low cost range hoods do not exhaust adequately for our use and the professional units are overly expensive partially due to extra features we will not use. We are not cooking here (there is no grease) so why pay for extras such as grease traps, filters and heat lamps, etc?
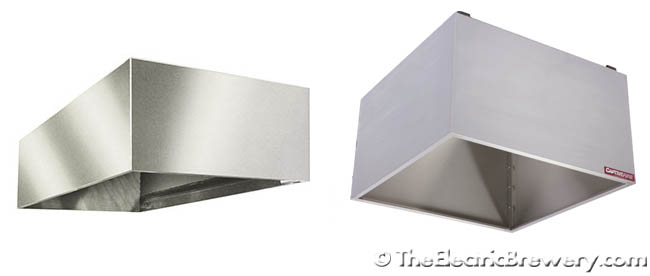
The answer came when looking at what restaurants and other industrial settings use to trap and manage heat and steam. They use what is called a "condensate" (or "heat") hood. This is a stainless steel box open at the bottom with a vent at the top. A full perimeter gutter with drain to trap and dispose of condensation is often included.
These hoods are simple as they are used only where non-grease heat, steam, or smoke is produced. You'll typically see them installed over dishwashers or pre-rinse sinks in restaurant kitchens. Since grease traps, filters, and other advanced features are not required, the design is much simpler, which helps reduces the cost. While still more expensive than lower priced range hoods, they are less expensive than large professional range hoods.
Some advanced condensate hoods use angled internal baffles and deflectors. This stops condensation from forming on the flat ceiling of the hood and dripping down. We were unsure if such baffles would be required in our condensate hood so tests were done first with a simple prototype hood (see the EXTRA INFO: Testing page). No issues were encountered with our tests so we chose to keep our hood design as simple as possible.
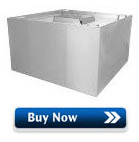
Advanced condensate hood with interior baffles: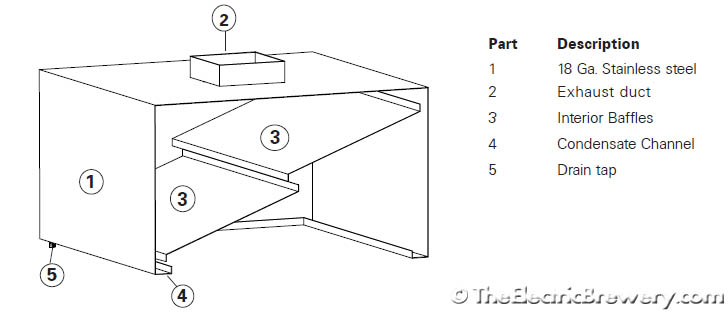
Our custom condensate hood has the following dimensions: 67" wide, 24" deep, and 12" high. This is wide enough and deep enough to fit over all of the kettles and still leaves enough room to work (dump in grains, stir the mash, etc).
A trough and drain is used to capture any condensation. The drain was positioned so that it is close to our sink for easy water run-off. In practice very little (if any) water makes it from the trough to the sink.
Normally a condensate hood will vent out the top using an external blower or fan. Our brewery is fairly tight for space so we chose to vent out the side near the Boil Kettle instead. Our 12" high hood was installed flush with the ceiling as the room is only 7 feet high. If your ceiling is higher consider venting out the top and/or using a higher hood.
Be careful with the orientation of the hanging brackets. You will need to make sure that you'll be able to access the nuts on all four hanging bolts. In our setup the bracket openings are open to the short ends of the hood.
A hood like this is straight forward to build so we recommend also checking around your area for shops that have stainless steel welding experience.
We obtained multiple quotes from various shops in our area and ended up purchasing a unit built to our specifications from a restaurant kitchen hood manufacturer (FastKitchenHood out of Montreal, Canada). While this custom hood is certainly not inexpensive by any stretch of the imagination (around $750 USD in 2009), they manufacturer restaurant hoods for approximately half the price of what most places will charge you. It was delivered less than a week later. Great service. Tell Sandro that Kal from TheElectricBrewery.com sent you!
Our custom condensate hood design:


