Search
Complete Guide to Building Your Brewery

$19.95 USD

Support our site by using these affiliate links
Temperature Probes
 We use RTD (resistive thermal device) temperature probes in our brewery. Thermocouple (TC) based temperature probes are also readily available and are often used in brewing setups. While either will work, an RTD will typically be more accurate and remain more accurate over the brewing temperature range we use as it offers better linearity. RTDs also remain more accurate over time (less drift which means less re-calibration). The cost difference between the two is negligible in our setup.
Temperature probes are used in the Hot Liquor Tank (HLT), Mash/Lauter Tun (MLT) , and Boil Kettle to send temperature readings back to our control panel:
- The Hot Liquor Tank probe monitors the water temperature so that the control panel knows when to fire the heating element to maintain the exact water temperature we set.
- The Mash/Lauter Tun probe monitors the temperature of the mash so that can see how fast the temperature rises. It does not actually control anything in our process but instead provides feedback as to how the brewing process is proceeding.
- The Boil Kettle probe monitors the wort temperature directly in the kettle so that the control panel knows when to fire the heating element used to boil the wort.
Temperature probes with NPT (tapered) threads attached to the Hot Liquor Tank and Mash/Lauter Tun output:
Temperature probe with a metric (straight) thread fastened to the Boil Kettle wall. (Note: The size of the silicone washer included with the probe has changed since this photo was originally taken):
The temperature probes for the Hot Liquor Tank and Mash/Lauter Tun are located in the plumbing at the kettle output while the Boil Kettle probe is installed directly in the kettle wall.
In process control systems such as ours that involve fluid recirculating, temperature monitoring is usually done in the plumbing instead of in the kettle. This helps avoid temperature misreads due to stratification (layering). This is not an issue in the Boil Kettle as the violent boiling action continuously stirs the wort to ensure an even temperature throughout the kettle.
Stratification is most likely to occur in the Mash/Lauter Tun. A temperature probe placed in the grain through the side of the kettle would only be measuring one location. We would not know when the entire grain bed is at the desired target temperature as it heats slowly from top to bottom. By placing the probe at the kettle output we ensure that the entire mash temperature is being monitored. For example, when we increase the Hot Liquor Tank temperature to 168F to perform a mashout, the water in the Hot Liquor Tank will reach 168F before the grain in the Mash/Lauter Tun. It is only when the Mash/Lauter Tun also reads 168F that we know that the whole grain bed is at 168F. Placing the probe elsewhere would not provide us with this accuracy.
The temperature probe bodies are made of stainless steel and come with a detachable connector at the probe end, making cleaning of the kettles much easier - you don't have to worry about damaging the probe cables. The 6 foot cables are teflon coated and rated to almost 600F.
Temperature probes as received:
 Just as we don't want cables dangling off the kettles as we try and clean them, we don't want the cables permanently attached to the control panel. Attaching small/thin cables permanently to anything big and heavy is simply asking for them to be ripped off by accident. We'll be adding 3-pin female XLR connectors which will allow the probes to be easily disconnected from the control panel if it ever needs to be moved.
XLR connectors are widely used in professional audio and video electronics cabling applications for their ruggedness and locking capability (so that they don't pull out by accident).
The cables are fairly thin and flimsy so we're going to add a stainless steel wire rope to help protect them from accidental breaks.
The entire cable assembly will then be wrapped in two layers of expandable braided sleeving and black shrink wrap to protect it even further and give it more substantial weight and girth.
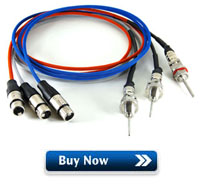
Temperature probes after modification:
The cables are protected with a stainless steel wire rope as strain relief and wrapped in two layers of expandable braided sleeving. A female XLR connector allows the probe to be disconnected from the control panel when required.
Close-up of the detachable connector at the probe end (Note: Probes today have 3 pins instead of 4):
Parts and Tools
To purchase temperature probes pre-assembled or in kit form, see our products page.
The following parts are needed:
- (Qty: 1) Stainless steel liquid tight RTD sensor, 2” probe, M14x1.5 Metric thread, detachable connector with silicone washer and stainless steel nut, Teflon cable
- (Qty: 2) RECOMMENDED*: Stainless steel liquid tight RTD sensor, 1.5” probe, 1/2" NPT thread, detachable connector, Teflon cable
- or -
(Qty: 2) Stainless steel liquid tight RTD sensor, 2” probe, 1/4" NPT thread, detachable connector, Teflon cable
- (18 feet) 1/8" expandable braided sleeving - black colour
- (18 feet) 1/8" expandable braided sleeving - blue colour
- (18 feet) Stainless steel wire rope, 1x7 strand, 1/32" diameter, 150 pound break strength
- (Qty: 3) XLR cable female connector, 3 pin
- (Qty: 6 inches) 5/8" black heat shrink tubing
- (Qty: 6 inches) 3/8" black heat shrink tubing
- (Qty: 18 inches) 1/4" black heat shrink tubing
- (Qty: 3) Small nylon cable tie
You'll also need the following tools:
- 30-40W soldering iron or soldering station
- Rosin core solder (63% tin, 37% lead)
- Wire cutter/stripper
- Heat gun
- Screwdrivers
*The probe with 1/2" NPT thread is recommended as it will not require a bushing (reducer) to fit in 1/2" plumbing. This is a newer probe that has only recently become available.
Some sellers do not ship outside the USA. If you live outside the USA (like us), we recommend using a forwarding service such as Shipito. We've used them to ship to Canada. The good news is that shipping within the USA is very inexpensive or often free. You then simply pay a small forwarded fee plus the cost of whatever shipping method you choose (USPS, FedEx, etc). They will even consolidate multiple packages into one to save on shipping. We recommend USPS whenever possible to minimize brokerage fees.
STEP 1: Attach the stainless steel wire rope and expandable sleeving
The cables are fairly thin and flimsy so we're going to also add a stainless steel wire rope to help protect them from accidental breaks.
 The fragile cables will then be wrapped with two layers of 1/8" expandable sleeving. The colours are not important here. Use whatever colour you like!
We used black as the first layer followed by blue. The sleeving on the inside won't be seen.
Finally some black heat shrink tubing is used to hold the lose ends of sleeving in place.
Before you begin, cut off the three spade connectors. They will not be used.
Stainless steel wire rope, expandable sleeving, heat shrink tubing, and the female XLR connector:
Loosen both of the screws on the detachable connector and loop the stainless steel wire rope around one of the two screws:
One at a time, slide on the two pieces of expandable sleeving to cover the enter length of the cable. Use electrical tape to hold together the ends of the first layer of sleeving when applying to second layer. Tuck both pieces under the detachable connector clamp and tighten both screws. Trim any lose edges of expandable sleeving and then slide on a 6" piece of 1/4" heat shrink tubing. Apply heat using a heat gun to shrink it:
Slide on a 2" piece of 5/8" heat shrink tubing so that it covers the bottom half of the detachable connector and apply heat using a heat gun to shrink it. The end of heat shrink tubing farthest away from the connector will likely not be tight. This is normal. We will be covering it up. If building from one of our temperature probe kits, we include higher ratio 3:1 heat shring tubing so this will not be an issue. 
Slide on a 2" piece of 3/8" heat shrink tubing so that it is over the 1/4 " tubing and the lose end of 5/8" tubing. Apply heat to shrink it:
STEP 2: Attach the female XLR connector
 There are only two places during our entire brewery build process where soldering with a soldering iron is required. This is one of them. If you've never soldered before I suggest you watch this YouTube video on the correct way to solder. It's quite simple.
A fancy soldering iron is not really needed here, but if you're considering a good quality unit that'll last you a lifetime and is easier to use, the Hakko FX-888D soldering station is an excellent choice. Over the years we've went through countless $10-$20 pencil soldering irons before buying one that would last and actually maintained heat properly. Use rosin core solder (63% tin, 37% lead). We recommend Kester 63/37 available in 1 lb spools and small 1 oz packs (more than enough for our project here).
We're going to solder the three temperature probe wires to the 3 pins on the female XLR connector.
Slide the XLR connector body on to the cable with sleeving. Then solder the two red wires to pins 1 and 3 and the white wire to pin 2. Crimp down the strain relief making sure it crimps and holds both sets of expandable sleeving and the stainless steel wire rope.
The small nylon cable tie helps hold the stainless steel wire rope in place. Make sure the rope is slightly shorter (tighter) than the signal carrying red/white wires before crimping everything down. This will ensure that the stronger rope (and not the fragile signal wires) will take the strain if you pull on the cable by accident.
Remove the screw from the female XLR connector to reveal 3 pins plus a shield: 
Soldering and securing the wires and stainless steel wire rope:
Slide the XLR connector parts back together and re-attach the screw. You're done!

Repeat the process for all three temperature probes. Your probes are now nicely protected and detachable.
The locking XLR plugs connect to the receptacles labelled BOIL PROBE, MASH PROBE, and HOT LIQUOR PROBE on our control panel:

Continue on to Building Your Brewery - Hot Liquor Tank.


